Colorado Adventure Guides logo
Book Your Adventure Today!
Silverthorne, Colorado
(970) 893-8007
info@coloradoadventureguides.com

Follow us

Backcountry Packing List

Experiencing Colorado’s snowy mountains can be incredible. At Colorado Adventure Guides, we want to help you stay safe and well-prepared for winter in the backcountry. Below is our recommended packing list to help you gear up for your next adventure.

We offer a full selection of backcountry education and AIARE Avalanche courses. Intro to Backcountry Ski/Split, AIARE Level 1, AIARE Rescue, and AIARE Level 2.

15
Activities Offered
6000
Acres of Terrain
485
5 Star Reviews
20
Years in Business

Winter Backcountry Packing List

Be Prepared.

You want to get out and enjoy the winter backcountry—but being prepared is just as important as having fun. The right gear, planning, and education make all the difference when things don’t go as planned. Your packing list may vary, but here’s a recommended list of essentials to consider for any winter backcountry adventure.

Clothing

The layering system

Base layer, mid layer, shell, hat, sunglasses/goggles, appropriate footwear, gloves

Emergency Response

Avalanche and Safety Gear

Avalanche transceiver, avalanche probe, avalanche shovel, first-aid kit, repair kit

Other Essentials

Be prepared

Mode of travel - skis/splitboard/snowshoes/snowmobile. Navigational tools, illumination, food, water, shelter, communication

Knowledge and Planning

Knowledge is Power

Have a plan and a backup plan, avalanche education, orienteering skills, check the weather and avalanche forecast

Paul Schmidt Bio
Clothing
The Layering System

Dressing properly and having the correct equipment will help provide a more safe and fun experience for you and your group. Remember that weather can change quickly and drastically. Pack for the season, not the weather​.

When choosing layers, think about what you would need to survive a long period of inactivity out in the elements.​ Dress like an onion, utilizing the layering system. This system includes a base layer, insulating layer, and shell layer.

Be bold, start cold! You’ll warm up quickly as you begin moving. On your hike, remember that sweat is the enemy, and layers should be removed before you get sweaty. Reduce your pace to reduce sweating if needed.​ Likewise, put on your shell layers before your clothes get wet with rain or snow, and bring a rain cover to keep your essential layers dry in your pack.

Materials

We recommend wearing technical clothing for all winter activities — it’s designed to keep you warm, dry, and comfortable. Technical fabrics help regulate your body temperature and wick sweat away from your skin so you stay drier and warmer. Choose materials like nylon, polyester, rayon, wool, or silk. Avoid cotton (like hoodies, jeans, or cotton socks) — it holds moisture and can make you cold fast.

Base Layer

A base layer is a layer of clothing worn next to your skin with the purpose of wicking sweat away so that you stay dry. Wearing a base layer made from a synthetic material such as polyester allows your body to regulate its temperature without feeling cold. These materials also dry very quickly. Another great option is wool which also prevents perspiration from staying in contact with your skin, and even wet wool is a good insulator. Wool prevents odors from developing so you don’t have to wash your base layers every time you wear them.

We like:

Ortovox Men’s Baselayers 

Ortovox Women’s Baselayers

Mid Layer

A mid-layer is an insulation layer which will protect you from the cold by conserving the heat generated by your body. The fiber’s ability to keep the warm air locked in is what makes it an insulating layer. The more air it locks in, the more your clothes will maintain your body heat. Materials such as fleece, down, or synthetic down make great insulating layers. 

Adapt your mid-layer to your warmth requirements:

  • High outside temperatures or sustained exercise: In these conditions you can go without a mid-layer. Remember to put a warm layer in your backpack to use if you stop and get cold, or if there is a change in the weather.
  • Cool weather conditions: Fleece is ideal as it combines warmth with good moisture removal qualities. Light, synthetic insulated jackets are also useful as they will keep you warm, compress down easily, and are easy to clean.
  • Cold or glacial conditions: Thick down jackets are excellent mid-layers in really cold conditions. This type of jacket is lightweight and can be compressed and packed easily. On the downside, if down gets wet, it clumps together and it loses its insulating qualities. These jackets shouldn’t be used in wet weather or when you are likely to sweat a lot.

We like:

Ortovox Men’s mid-layers

Ortovox Women’s mid-layers

Shell Layer

A shell is a waterproof or shielding layer that is designed to protect you from the elements like rain, snow and wind. This layer should ideally be waterproof and breathable. Waterproof clothing also has waterproof seams and some shell layers have zippered vents to drop extra heat. The more breathable the fabric, the more suited it is for high-intensity exercise. Water-repellent clothing, also called softshellis very flexible and feels nice to wear.  It is breathable, so sweat is removed when you exert yourself. If the weather conditions deteriorate, the water-repellent treatment on the outer shell of the material, or in some cases on all of the membrane, will be enough to protect you from light rain or a quick snow shower.

We like:

Ortovox Men’s Shells

Ortovox Women’s Shells

Hat and Gloves

Your body loses a good percentage of heat through the head and hands. In the winter it is recommended that you carry layering for both your head and your hands.

Head Protection: A wool or synthetic beanie will help to retain heat when cold. While exerting energy, this layer might create too much heat, and so a buff or ball cap can help to create more airflow and wicking properties as well as sun protection with a brimmed hat.

Hands: We recommend carrying 2 pairs of gloves. One glove is a liner-style glove which is thinner and more breathable for use while exerting energy. You also want to bring a larger, more “shell” style glove that offers more protection from the elements and retains more heat.

We like:

Ortovox Gloves Men’s

Ortovox Gloves Women’s

Eye Protection

Snow blindness is basically a sunburn for your eyes. Snow reflects roughly 80% of the sun’s UV rays, so it’s easy to get overexposed without realizing it. Always protect your eyes with quality sunglasses or goggles.

We like:

Julbo Goggles

Appropriate Footwear

Match your footwear with your intended mode of travel.

Socks: Wool socks are likely best for winter travel- no cotton.

Boots: Ski boots, snowboard boots, or waterproof hiking boots

Women Mentorship Program
Avalanche and Emergency Response Gear
Avalanche Rescue and Safety Gear
Avalanche Transciever

Anyone traveling in snowy, mountainous terrain should carry an avalanche transceiver, also called a beacon. It’s a device that can send and receive signals to help locate people buried in snow. Before heading out, everyone in the group sets their transceiver to transmit mode. If an avalanche happens, others can switch to receive mode to search for and locate buried party members.

An avalanche transceiver doesn’t prevent avalanches or burial, but it helps rescuers locate buried victims more quickly, increasing the chances of survival.

We like:

Ortovox avalanche beacons

Avalanche Probe

Another essential piece of avalanche safety equipment is an avalanche probe. A probe is a collapsible rod, usually between 160–300 cm, made from aluminum, carbon, or steel. After an avalanche, it’s used to probe the snow to locate buried victims and determine burial depth. Used together with an avalanche transceiver, a probe allows for faster, more precise rescues.

We like:

Ortovox avalanche probes

Avalanche Shovel

The third essential piece of avalanche equipment is an avalanche shovel. Just as important as a transceiver and probe, avalanche shovels are metal, collapsible, and come in different shaft lengths, blade sizes, and grip styles. When choosing a shovel, construction quality, functionality, and safety standards are key considerations.

We like:

Ortovox avalanche shovels

First Aid Kit

Your group should carry an adequate first aid kit based on the number of people and the length of your trip. When putting your kit together, consider:

  • Group size
  • Trip length
  • Proximity to outside help

Essential items to include:

  • CPR mask and personal protective equipment
  • Supplies for bleeding, scrapes, burns, and blisters
  • Sprain and strain support
  • Materials for bone breaks or limb immobilization
  • Treatment for stings or bites
  • Medications (pain relief, allergy, stomach, etc.)
Repair Kit

The repair kit is another piece of equipment that could be considered as “group gear.” Not everybody in your group needs one, but you should have at least one kit for your group. Contents of the kit may vary depending on mode of travel, group size, location, and number of days in the field. Some examples of a repair kit items are:

  • Ski straps
  • Duct tape
  • Bailing wire and/or p-cord
  • Zip ties
  • Multi-tool and knife
  • Extra batteries
  • Gore-tex repair patch
  • Sewing needle and thread
  • Extra screws/parts for mode of travel (skis, splitboard, snowshoe, etc.)
  • Pole basket
  • Lighter
  • Hose clamps
backcountry packing list
Other Gear
More Essentials
Mode of Travel

When traveling in the backcountry in winter the last thing you want to do is get caught out post-holing in waist deep snow moving .1 miles per hour. Be prepared and match your mode of travel with your intended activity for the day.

  • A/T or telemark ski
  • Splitboard
  • Snowshoe
  • Snowmobile
Navigational Tools

Along with your other backcountry essentials, make sure to bring reliable navigational tools. These will help you find your way back if you get lost or go off-trail. Don’t rely only on GPS watches, smartphones, or other electronic devices, as they can fail or run out of battery. Bring a topographical map and compass—and know how to use them. Consider taking a map and compass course to build your skills.

We like:

Suunto MC-2 NH Mirror Compass

Illumination

Always prepare to spend a night in the woods, which means packing a headlamp or flashlight (as well as extra batteries.)​ Consider a light with a lock mode so it doesn’t turn on accidentally, and ​red mode for maintaining night vision. Check that your light is functional before heading out and keep your headlamp in an easy-to-access spot in your pack.

We like:

Black Diamond headlamps

Food and Water

The amount of food and water you bring depends on your trip length and level of exertion. As a baseline, plan for 2–3 liters of water per person. Bring a way to make additional clean water, like a filter or iodine tablets, in case your trip lasts longer than expected or you spill a bottle. Iodine or similar tablets can also be stored in your first-aid kit for emergencies.

Pack enough food for your planned hike, plus extra. Extra food helps maintain energy, morale, and decision-making if your hike takes longer than expected. A full day’s worth of additional food is a good rule of thumb, ideally items that don’t require cooking.

Eat a balance of proteins, carbs, and fats throughout your trip. Carbs provide quick energy but can lead to a crash, while fats and proteins burn slower and support long-term energy. Good snack options include nuts, chocolate, cheese, meat sticks, energy bars, dehydrated fruit, and crackers.

Shelter

Your emergency shelter is your protection from the elements, used to keep yourself dry and warm in case you become stranded or injured on the trail.​ When day hiking in more remote places, a good rule of thumb is to pack as if you would need to spend the night. We recommend packing one or more of the following:​

  • Ultralight tarp​
  • Bivouac sack
  • Emergency space blanket

We like: Rescue Sled/Shelter

Sun Protection

Don’t underestimate the importance of protecting your skin and eyes in the outdoors. Apply broad-spectrum sunscreen to exposed skin and reapply often. Wear sunglasses or goggles with UV protection—polarized lenses are best for reflected light from snow or water. Products like Dermatone provide an extra layer of protection against sun, wind, and in winter, frostbite.

At higher elevations, UV rays are stronger because the thinner atmosphere absorbs less radiation. UV intensity increases roughly 10–12% for every 3,000 feet of altitude, and snow reflects about 80% of UV rays back onto your skin. Always take extra precautions to protect yourself.

Communication

Make sure you have a way to communicate with your team and the outside world—communication is critical in the backcountry. Here are some common options:

  • Cell Phone
  • GPS
  • Personal Locator beacon (inReach, SPOT)
  • 2-way radios

We like:

BCA Link Radios

Garmin In-Reach

Advanced Splitboarding Course
Planning and Knowledge
Proper planning prevents poor performance
Have a Plan

Before you head out into the field, make sure to have a plan. Below are some important considerations when making your plan:

  1. What activity are you doing?
  2. Who are you going with? 
  3. What is the weather and avalanche forecast, and any concerns?
  4. Where are you going? What are your alternate options? 
  5. Who knows where we are going? What is our estimated time of return?
  6. Do we have all the necessary gear and training? 

Use your digital resources, books, maps, etc. to plan your route and familiarize yourself with the area you will be exploring. ​Take note of the mileage and elevation gain of your intended trip, certain decision points, other potential hazards including avalanche and weather, evacuation points, nearest medical facilities, and so on. Always create a Plan B, or bailout option, for your trip should the weather turn or other challenges arise. Constantly monitor where you are at in line with your plan​ and always be willing to go with your backup plans.

Orienteering Skills

Map reading and using a compass are skills that are perhaps the most important to practice. Be sure to ​choose the right map for your activity and area, learning the symbols, scale, compass rose, colors, declination, and contour interval of the map you will take into the field. ​Be familiar with your compass and how to use it. Practice with your map and compass with identifying aspects/elevations, specific features, and shooting bearings from map to compass and compass to map. No matter how sure you are, it doesn’t hurt to check the map.

Avalanche Education

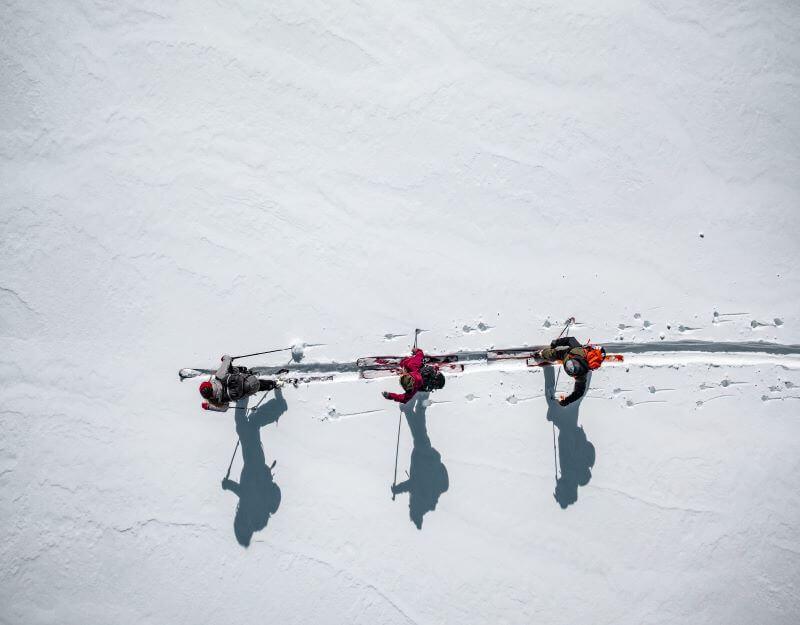
Traveling in the winter backcountry requires a strong understanding of avalanche risk and the knowledge to mitigate these risks through appropriate terrain assessment and decision making. There are several different options when it comes to avalanche education.

Free Resources – Start with books, online searches, free clinics or seminars. Our free Avvy Savvy Clinic series is a great place to start learning.

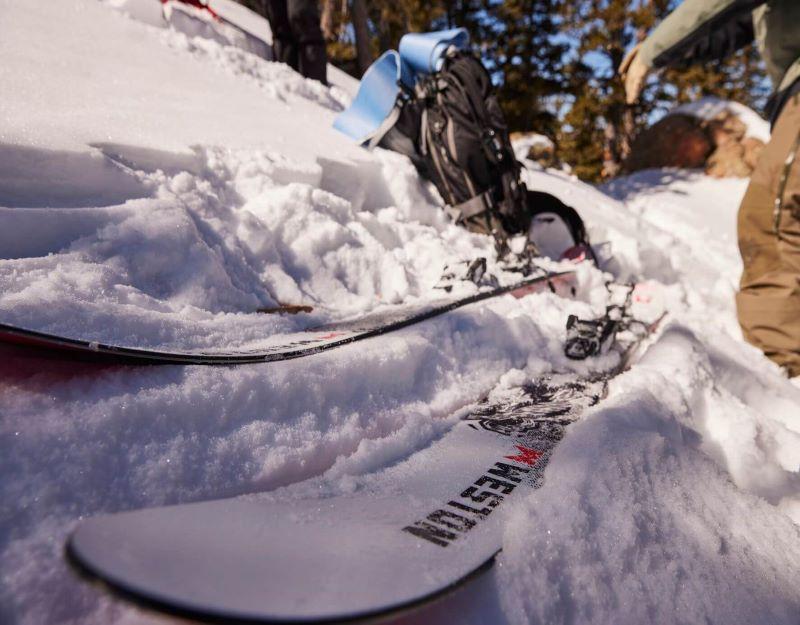
Intro to Backcountry Course or Go with a Mentor – Next we would recommend going out with somebody else experienced or to book a 1-day Intro to Backcountry Course. This field-based course covers gear use, avalanche awareness, terrain use and management, and more.

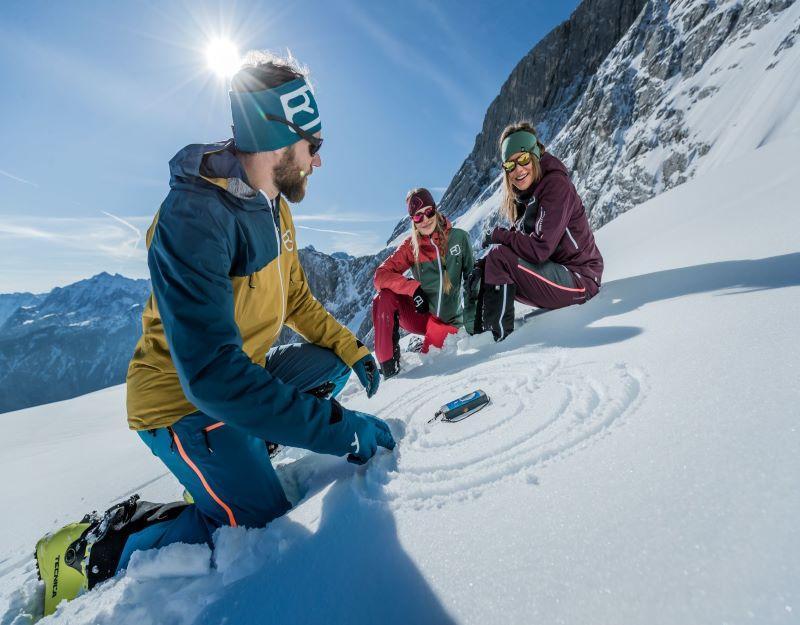
AIARE Avalanche Level 1 – Now that you have a solid understanding of how your gear works, you’ve learned some basic touring skills, and taken an introduction to terrain and avalanche awareness, it’s time to get some education. We recommend taking an AIARE (American Institute for Avalanche Research and Education) course. AIARE is the gold standard in avalanche education and Colorado Adventure Guides is the largest AIARE education provider in the state.

AIARE Avalanche Level 2 Course – You took your knowledge and put it use. Now that you have some experience applying the knowledge and processes that you learned in your AIARE 1 course, take it a step further and learn how to become a leader within a small group and close gaps of uncertainty in the backcountry in one of our AIARE 2 courses.

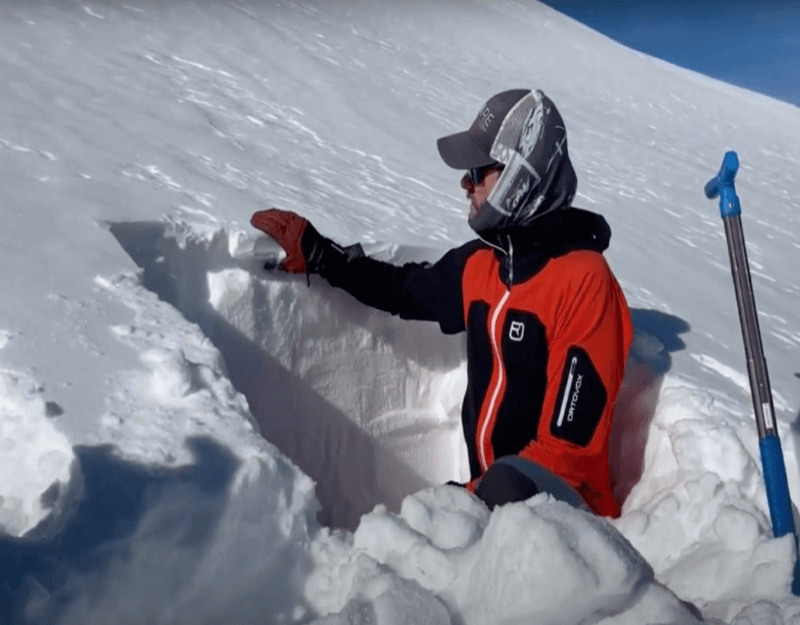
Pro Level Avalanche Course – If you’re looking to continue your education, or are looking to start working in the industry, take a Pro level course. Dive deeper into operational and advanced topics in these courses and learn how to mitigate risk from the operational side.

Avalanche Refresher Course – If you don’t use it, you lose it! If it’s been a while since your last avalanche course or you haven’t practiced your skills recently, consider taking a refresher course, reviewing your materials, or attending free clinics and seminars. Staying current helps keep your skills sharp and ensures you’re up to date on the latest avalanche safety practices.

Medical Training

Know your abilities and grow your abilities: Your first-aid kit is only as good as your ability to use it, so get trained ​through any number of courses. Below is a recommended list of options:

  1. Basic First Aid and CPR Course
  2. Wilderness First Aid (16 hrs)​
  3. Wilderness First Responder (72+ hrs)​
  4. Wilderness EMT (170+ hrs)​

Prevention is always the best medicine. Many ailments in the backcountry are simple to prevent outright, or to address in their early stages.​ The consequences get higher as ailments get worse or combine with other challenges or injuries.​ In other words, fix the small problems before they become big problems.​ Most importantly, stay well fed​, stay hydrated​, and layer properly.

We like: 

AIARE Avalanche Rescue + WFA Course

Winter Backcountry Courses & Clinics
Winter Backcountry Clinics Resized
Free Winter Backcountry Clinics
Backcountry Clinics
Intro to Backcountry Touring
Skiing & Splitboarding
Intro to Backcountry
AIARE Level 1 Avalanche Education Course
Avalanche Safety Course
AIARE Level 1
AIARE Avalanche Companion Rescue
Companion Avalanche Rescue
AIARE Rescue
AIARE Level 2 Avalanche Education Course
Analyzing Snowpack and Hazards
AIARE Level 2
Backcountry Touring in Colorado Resized
Bridge The Gap
Backcountry Mentorship

CONTACT US

Your backcountry education starts here!

CONTACT US TODAY TO BOOK AN AVALANCHE EDUCATION COURSE 

Our friendly reservation staff is standing by to answer questions and discuss the details of your avalanche safety course.

204 Ryan Gulch Rd Silverthorne, CO 80498

(970) 893-8007

info@coloradoadventureguides.com

    LOCATION

    204 Ryan Gulch Rd, Silverthorne, CO 80498

    PHONE

    (970) 893-8007

    EMAIL

    info@coloradoadventureguides.com